


Table of contents
Qt offers QColorDialog, which looks like this:
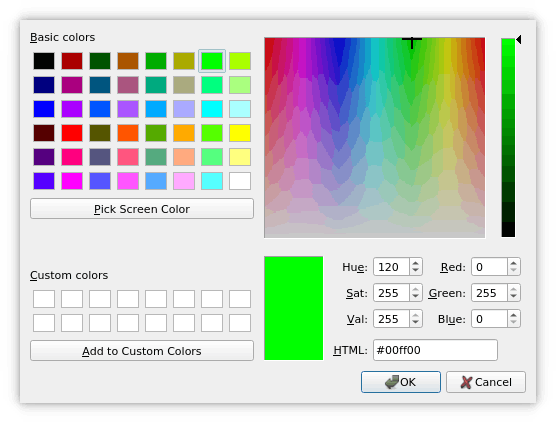
But one might prefer a color picker like the ones from:

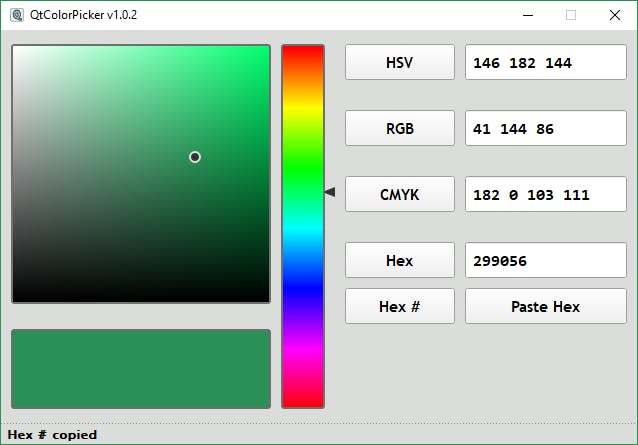
Preview
The color picker we’ll be looking at today is simpler and resizable, take a look:

Composition
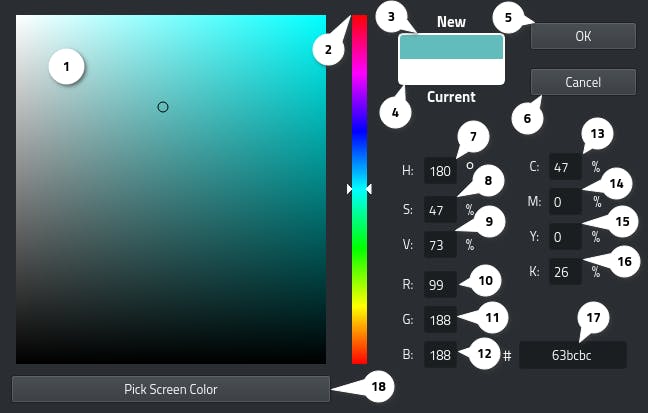
1. Saturation and value selector:
This widget is a plain QWidget, and the gradient color is painted in its paintEvent, using a QImage:
hueLayerImage = QImage(maxSV+1, maxSV+1, QImage::Format_RGB32);

for (int s = 0; s <= maxSV; s++)
{
    for (int v = 0; v <= maxSV; v++)
    {
        color.setHsv(h, s, v);
        hueLayerImage.setPixel(s, maxSV-v, color.rgb());
    }
}
The trick in resizing it is very simple, just scale the image that will get drawn, but don’t overwrite QImage object with the new scaled image, as it will ruin it when resized, you can do it if you want to check and see what happens.
This is how you draw the scaled image:
p.drawImage(5, 5, hueLayerImage.scaled(size().width()-10,size().height()-10));
The value of 5 is equal to the margin of the widget divided by two.
2. Color/Hue selector:
Just a QSlider with a range of 0–360. The handle is modified to add more precision when choosing a color. The two triangles are drawn in painEvent, and because they need extra space to be visible when at maximum/minimum value, I added a margin to the slider equal to the length of the triangle’s base divided by 2 (this is the reason why the previous widget has to be painted with a margin so that they match).
The color is fetched using:
currentColor = grab().toImage().pixel(currentColorPosition);
where currentColorPosition is calculated in paintEvent this way:
int y;

//10 is margin-top + margin-bottom
if(invertedAppearance())
{
    y = value() * (height()-10) / maximum();
}
else
{
    int position = maximum() - value();
    y = position * (height()-10) / maximum();
}
//x is center, y is the position of the currently pointed at color
currentColorPosition = QPoint(width()/2,y+5);
and then the other widgets get notified of the new color using a signal.
3. 4. New/Current color label:
Two simple QLabels; one displays the color currently being chosen. The other displays the current color.
5. OK/Cancel buttons:
Two simple QPushButtons, when clicked; one emits a signal about the newly chosen color and then closes the color picker. The other closes the color picker without doing anything.
7. 8. 9. Hue/Saturation/Value control spin boxes:
Three simple QSpinBoxes that control the color’s HSV values, hue being ranged from 0–360°, saturation and value being ranged from 0–100%.
10. 11. 12. RGB control spin boxes:
Three simple QSpinBoxes that control the color’s RGB values, ranged from 0–255.
13. 14. 15. 16. CMYK control spin boxes:
Five simple QSpinBoxes that control the color’s CMYK values, ranged from 0–100%.
17. Hex line edit:
A simple QLineEdit that controls the color’s hex, with the following mask: HH HH HH.
18. Pick screen color button:
When this QPushButton is clicked, a QDialog with the size same as the current screen is exec()ed, with the Qt::WA_TranslucentBackground attribute set.
This dialog will be used to pick up mouse events outside of our color picker window (not actually but it looks like it, it’s a hack/workaround which I thought of and then found out Qt uses as well).
Note: This feature currently does not work on Windows.
This was a brief explanation of how this color picker works and what is it composed of.
The full code can be found on my public repository on Bitbucket.
Enjoy!